
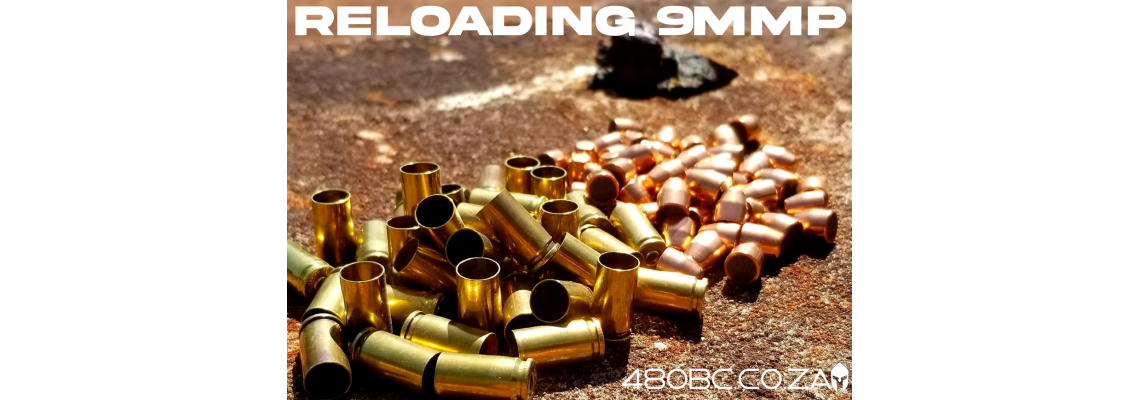
These posts will be to try and help you learn about the reloading
process. I have found that some new reloaders struggle in the beginning because
they do not understand the whole process. By this I mean understanding what
each die does and why…so let’s jump in.
Warning – this will
only apply to 9mmp loads as it is by far the most reloaded cartridge in SA.
Loads discussed are my own. Do not copy them, do a proper safe load
development.
Part1 – Resizing
So you have shot a few rounds at the range and hopefully you remembered
to collect your cases; they are the most expensive part of the reloading
components after all.
The only cases I would suggest you leave in the trash can is Berdan
primed cases but more on that later.
Let’s look at what happened to the case when it was fired and why we
need to resize. For that we need to look at the design of the 9mmp.
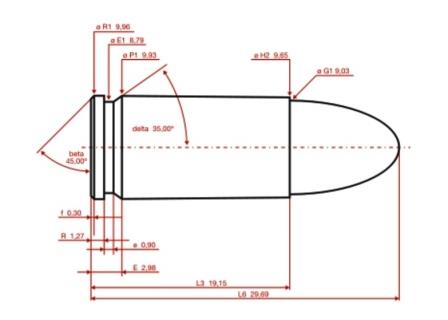
9mmp, 9mm Para, 9mm Luger, 9x19 are a few of the names associated to the
9x19mm Parabellum, designed by Georg Luger in 1902 for the Luger Semi Auto
Pistol. You see why it is sometimes called 9mm Luger – actually it is
officially designated as the 9mm Luger by the Sporting Arms and Ammunition
Manufacturers' Institute (SAAMI).
Here in good old South Africa is more commonly referred to as 9mm Para –
Para being for Para bellum – taken for the Latin “Si vis pacem, para bellum”.
Different names for the same thing…just don’t confuse it with 9mm Makarov or
9mm Short.
The 9mmp is a rimless, tapered case.
What is rimless? Just what it says a 9mmp does not have a rim as such.
Most revolver cases have rims that hold the case in place in the cylinder. A
9mmp has an extractor groove and a “rim” to aid extraction. This “rim” however
does not hold the cartridge in the chamber as a Rimmed Revolver case holds the
cartridge in a revolver cylinder.
Tapered? This is an important part to understand. Simply the bottom of the
case before the extractor groove is bigger than the case mouth. Not by much,
only 0.28mm. This is the part of the design that could make resizing difficult.
The 9mmp or most other semi auto pistol calibres headspaces on the mouth
of the case; take your barrel out of your gun safely, look down the chamber and
you will note a ridge just before the rifling of the barrel. The case stops on
this ridge when loaded in the chamber.
Now when the cartridge is loaded from the magazine it will stop on this
ridge in the chamber. When the primer pin/striker hits the primer, the primer
is crushed and ignites the gun powder in the case. The gun powder creates a pressurized gas that
expands the case to seal the breach of the firearm. This seal of the chamber is
to prevent gases from escaping rearwards and force the bullet down the barrel
on to the target.
Cases are made of brass and expand under pressure to form a closed gas
tight fit with the sides of the chamber, and then contract slightly so that the
case remains loose and can be removed by the extractor.
Now if you understand this you will see that the case takes a lot of
pressure and has now lost its original shape. Now we need to reshape the case
back to its original dimensions to reload it again.
Ps. you need to clean your brass before you continue; there are many
ways and we will discuss this later but for now let’s imagine the case has been
cleaned.
So now we get to part 1 of reloading a 9mmp, resizing it back in shape;
this is done with a resizing die, this die also removes the old primer.
Let’s look at the Lee resizing and decapping die…and in my mind you
cannot get a better die for the job. This die has a carbide sizing ring that
resizes the case. You do not need to lube cases for resizing when using a
carbide die BUT lubing the cases will just make life easier. And on a
progressive make things run smooth and help in extending the life of your press.
Setting up this die is where most problems begin. An incorrectly set die
will not fully resize the case which will lead to feeding problems. Follow
Lee’s instructions specific to your press.
Step 1 - Make sure you have the correct shell holder installed if you
are using a single stage or turret press, same goes for a progressive press -
use the correct shell plate. Raise the ram/carrier to the top of the stroke.
Keep pressure on the ram/carrier.
Step 2 – Turn the die in until it makes firm contact with the
ram/carrier.
Step 3 – Drop the ram/carrier slightly and turn the die more in. Consult
your press instructions…1/3 turn more in for the Six Pack Pro, Pro4000, 2023
Pro1000. Single Stage and Turret do not turn more in, only touching your shell
holder.
Step 4 – Set your lock ring or breech lock bushing.
Your sizing die is now set.
The decapper should be set deep enough to remove the primer but not so
deep as to obstruct the case from fully entering the die. You can set the
decapper clamp so that if you get a Berdan primed case in your press it just
pushes the decapper out instead of breaking it. But more importantly you should
learn to feel what is happening with the press. If you feel resistance here
rather stop and have a look.
Ok, now run a few cases through the resizing die. Have a look each time
to make sure the bottom of the case is going all the way in the die – not the
extractor groove. Do not set your die too deep as it will cause issues on a
progressive press!
The die is designed to resize the case back to its tapered original size
which is why sometimes a 9mmp can be hard to resize but following these
instructions, adding a bit of lube and not short stroking the press should give
you properly resized cases every time.
However cases do not last forever. You could get cases where the bottom
has “bulged” from numerous firings or high pressure loads. These cannot be
resized with the normal sizing die. The only way to correct them is to either
roll them on a roll sizer or run them trough a Lee Bulge Buster. Read here for
more on that.
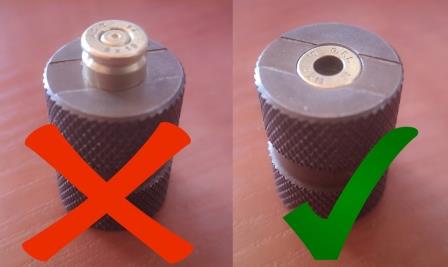
Now there are 2 ways of checking that your cases are properly sized. You
could either barrel drop them in your guns barrel – safely removed from the gun!
Or a using a Case Gauge…these are designed to SAAMI minimum specs and if the
empty case fits in all the way it will fit in any 9mmp.
Up next we look at priming…
Leave a Comment